Most guides to military-style rucking focus squarely on physical preparation. They tell ambitious ruckers to lunge and deadlift their way to a successful ruck march. Yet, it doesn’t matter how big your leg muscles are if you’ve got blistered feet, a poor fitting rucksack and clothes that are hot and uncomfortable.
The real preparation for a weighted march starts the night before your trip. If you’re heading out on an extended ruck, you already have a reasonable degree of physical fitness. It’s the little details that could hold you back. Here are some of the actions we advise taking before and after an extensive ruck.
What to Do Before a Ruck?
-
Get Plenty of Sleep
-
Hydrate
-
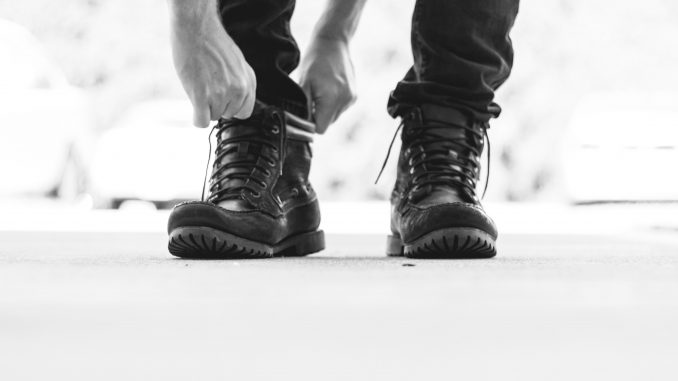
Break Your Boots In
-
Beat Those Blisters
-
Eliminate the Chafe
-
Wear Two Pairs of Socks
-
Invest in High Quality Boots
-
Warm Up
-
Pack Your Rucksack Properly
-
Start Tracking Your Rucking Session
Get Plenty of Sleep

Physical performance experts say the human body loses a quarter of its performance capabilities after 24 hours of missed sleep. If you want to ensure peak endurance and efficiency on a march, you need to fully replenish your energy reserves. Even a few hours of restless sleep or one late night before your walk can result in accelerated fatigue and slower reaction times. To ruck for longer, sleep for longer. Have an early night before your march.
Hydrate

It’s not enough to drink lots of water during a ruck march, though this is important. For one thing, every water bottle you carry adds extra weight. To be optimally efficient, you need to start a ruck march fully hydrated. That way, you can carry fewer bottles and give yourself the best shot at finishing. For 2-3 days before a ruck, drink a gallon of water daily.
Break Your Boots In

By all means, invest in boots that are designed for intense walking. Just don’t wear them fresh out of the box. New shoes tend to chafe and pinch because their material is untested. You can fix this fast (even the night before a march) by stuffing them with wet paper. Concentrate on problem areas like the toes and heels.
Beat Those Blisters
You think the weight is the hardest part of a military-style ruck march? Wait for the blisters. Though small, blisters on the feet can quickly become debilitating. This is why soldiers spend a lot of time prepping their feet before a march. One popular strategy is to rub the feet with an anti-fungal powder. It soaks up moisture and reduces the friction which causes blisters. Here are some other ways to avoid ruck march blisters.
Eliminate the Chafe
Similarly, you might want to consider applying a balm or glycerine based lubricant such as Vaseline before the march. Rub it over your toes and heels. If your feet are well lubricated, they’re less likely to chafe. Carry the lubricant with you, in your rucksack, and reapply it to any areas which feel like they’re becoming sore during the march.
Wear Two Pairs of Socks

It’s common practice within the military to wear two pairs of socks while ruck marching. It’s yet another way to prevent painful blisters from forming on the feet while walking. It’s important to make the inner sock a thin liner type sock. It wicks away moisture but only rubs against the outer sock, a thicker and rougher sock. It’s better than the sock rubbing against your skin.
Invest in High Quality Boots
Take an example from the military and wear walking boots that are at least 8’’ high. This is especially important if your route crosses water. The outsole should, ideally, be made out of tough rubber or polyether polyurethane. The upper should be made out of a leather or non-mesh fabric. Remember, the best boots for the job aren’t always the prettiest. Sometimes, the toughest shoes are the ones with the most battle scars.
Warm Up
Depending on the amount of weight you’re carrying in the rucking session, if you decided to go heavy, we highly recommend that you warm up.
How does one warm up for rucking?
Well let’s say you’re carrying 50lbs for your rucking session today. Before packing your bag with all the weight, try packing 25 lbs and walk around the block for a few minutes. Then work your way up to 40 lbs, and then take it up to 50 lbs.
The gradual increase in weight will give your body time to adjust to the weight instead of shocking it right away with a heavy 50 lbs.
You could also consider warm up by doing some exercises like:
- Shrugs
- body weight squats
- Push-ups
- Shoulder raises
- Crunches
Why you ask?
This will help send blood to the muscles that will most certainly be worked out during your ruck session. This is also a great signal to your body to prepare itself for an upcoming workout.
Pack Your Rucksack Properly
You never know what you’ll need during your rucking session. Whether that be your hydration bladder, rucking socks, rucking boots, first-aid kits, rucking plates or even anti chafing balm. One thing you need to make sure you do is PACK THE HEAVIER ITEMS ON TOP.
The US military pointed out that doing that alone can help a soldier save 25% of their energy spend. Looking for more rucking tips? check out our rucking and ruck march tips post.
Start Tracking Your Rucking Session
Tracking your rucking session is key to improving and seeing more weight loss or strength gain, whatever your goal is really. This is because the more data you have at your disposal, the easier it becomes to go back and see what you can change and see what weight or time works best for you.
For example, you might notice that you dropped the most weight when you were carrying 30lbs for an hour and half compared to another week where you carried 50lbs for an hour. Of course you will have to take into account for diet, sleep, stress, and other factors but still, it really helps you keep yourself accountable and reassess your performance.
Check out all the rucking apps we’ve used in the past to track our performance.
What to Do After a Ruck?
Stretch Those Limbs

After a long ruck, take five minutes to dynamically stretch your legs. You will be tired but try not to skip this step. Butt kickers, leg swings, knee highs and side steps are all effective options. Any movement that requires you to perform a full range of motion with the hips is recommended. Gentle swimming is a great way to take a load off after a march while also preventing your legs from stiffening up.
Tend to Your Sore Feet
Even if you had no trouble with your feet during the ruck march, inspect them afterwards. Any blisters need to be cleaned because they may have come into contact with dirt, fibre and bacteria.
Spray popped blisters with an antibacterial spray. Cover the wound with a band-aid but don’t pull it too tight across the skin. Unpopped blisters should be left untouched unless they are making it difficult to walk. In this case, use only a sterilized needle (soak in boiling water) to pop and drain the fluid.
Nurture Your Body
Water is essential for every metabolic function in the body. The more water you replace, the faster you’ll recover. While it’s important to rehydrate, take it gradually. Chug water steadily (little and often) throughout the twenty-four hours following an intense ruck. Feed your tired muscles with high-quality carbohydrates, protein and fats. Nuts, crackers, cheese, oats, grilled poultry, avocado and oily fish like salmon and tuna are some of the best recovery foods.
Record Your Rucking Session
There’s always a sense of accomplishment right after your rucking session. However, it can be really tempting to just get back, shower, eat and sleep. There’s nothing wrong with that as long as you’re done with your stretching and all, BUT DONT FORGET TO HIT THE STOP BUTTON ON YOUR RUCKING APP.
Been there a million times. You grab your phone to check instagram and notice that your rucking app has been active the entire time from when you started the ruck till the 20th minute of a F.R.I.E.N.D.S episode on Netflix.
What can you do to remind yourself?
If you know you’re going for an hour ruck, just set an alarm on your phone. Alternatively, you can set a reminder on your phone and set it to the time you expect to be done with your ruck.
